Why Grow Herbs at Home?
Let’s be real: fresh herbs from the store aren’t cheap. A few sprigs of basil or a handful of thyme can cost as much as a full meal—and half the bunch wilts before you even use it. By growing your own, you cut out constant purchases and only snip what you need. The savings add up fast, especially if you cook often.
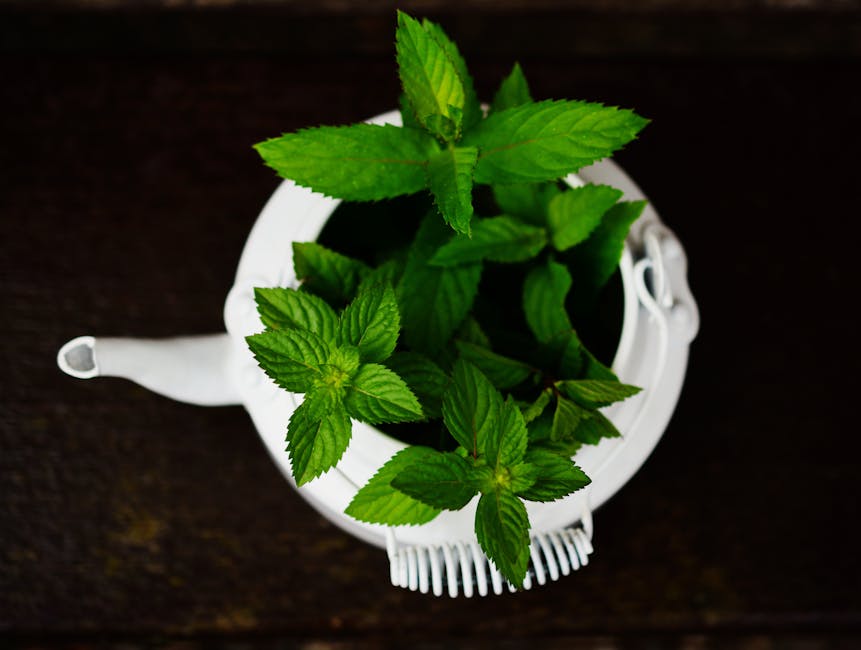
But it’s not just about the money. Having herbs within arm’s reach means better flavor, any time of year. You don’t need to wait for spring or hit the grocery run. Whether it’s mint for a quick tea or parsley for that last-minute garnish, the convenience is real.
And the best part? You don’t need an acre—or even a yard. Herbs thrive in small containers and sunny windowsills. Whether you’re in a studio apartment or a full house, a few pots can yield a steady stream of fresh flavor. Low cost, high reward. That’s the herb garden deal.
Step 1: Choose Your Herbs Wisely
If you’re new to growing herbs, don’t overthink it. Start with herbs that are tough, forgiving, and useful in the kitchen—basil, parsley, thyme, mint, and rosemary all make the cut. They’re popular for a reason: they grow fast, aren’t too picky, and show up in recipes often.
Understanding the difference between annual and perennial herbs will save you some head-scratching later. Annuals like basil and parsley live for just one season, so you’ll need to replant them each year. Perennials like mint, thyme, and rosemary come back with the seasons and can stick around for years—if you treat them right.
Here’s the catch: herbs aren’t one-size-fits-all. What thrives on a dry patio in Arizona might wilt in a damp Seattle windowsill. Basil prefers warmth and full sun. Mint doesn’t mind some shade and grows like it owns the place (which it will, if you’re not careful). Check your local climate and observe your home’s light patterns. South-facing windows are gold. If you’ve got limited sun, go for herbs that can handle partial light like parsley or chives.
Smart choices at the start make the whole process easier. Cut corners here, and you’re just planting frustration.
Step 2: Pick the Right Location
Choosing between growing herbs indoors or outdoors depends less on preference and more on what you can consistently control. Indoors gives you protection from pests, unpredictable weather, and seasonal changes. You can tend to your plants without stepping outside, and because the environment is more stable, herbs like basil or parsley often do well on sunny windowsills. But indoor growing comes with space limits and light challenges. If your home lacks sun-soaked spots, herbs will struggle to thrive, no matter how much love you give them.
Outdoors, you’re working with real sunshine—nature’s grow light—which herbs love. A sunny balcony, patio, or small garden bed opens the door to sturdier growth and bigger harvests. However, you’ll need to stay on top of watering, wind exposure, and temperature swings. Plus, the local bug population may take an interest in your crop.
South-facing windows are prime indoor real estate. They provide the strong, consistent light that herbs crave. If outdoors isn’t an option, focus on maximizing natural light through location and rotation. For balconies, aim for the sunniest available area. More light equals more flavor—it’s that simple.
And here’s the thing most growers miss: herbs aren’t shade lovers. They need at least 6 hours of direct sunlight a day. Some, like rosemary and oregano, prefer even more. If your setup can’t deliver that, invest in grow lights or accept that your plants might only survive—not thrive.
Step 3: Containers and Soil
Good soil and the right pot are the non-flashy fundamentals of a solid herb garden. Choose containers that are big enough to allow root systems to expand—herbs like basil and mint will choke in cramped quarters. As a rule of thumb, deeper pots are better for rosemary and other woody herbs, while leafy guys like parsley don’t mind a bit less depth.
Drainage holes aren’t optional. No drainage means root rot and sad, mushy plants. If your container doesn’t already have holes, drill them yourself. A saucer underneath will catch runoff and protect your surfaces.
As for soil, skip dirt from your backyard—it’s too dense and may carry pests. Go for a high-quality potting mix, ideally one labeled for herbs or vegetables. These mixes are loose, well-aerated, and designed to hold moisture without waterlogging.
To take things up a notch, amend your soil with compost. It boosts nutrient content and improves soil texture. A handful or two of quality compost mixed into the potting mix can make a world of difference for plant health and flavor. If you want to DIY your own compost at home, take a look at The Beginner’s Guide to Composting Food Waste to get started.
Containers and soil aren’t the exciting part—but they’re what keep your herbs thriving instead of barely surviving.
Step 4: Watering and Feeding
Herbs don’t like wet feet. That’s the number one mistake beginners make—watering too often, not too little. These plants evolved in dry, rocky soils, not soggy pots. Overwatering often looks like underwatering: yellowing leaves, stunted growth, wilting. The key is to let the soil dry out slightly between waterings. Stick your finger an inch into the soil; if it’s dry, it’s time to water. If it’s damp, wait. Simple rule, big impact.
When it comes to fertilizing, less is more. Herbs grown for their leaves—like basil, mint, or parsley—don’t need constant feeding. In fact, too much fertilizer can make them taste bland. If your herbs are in fresh, high-quality soil, skip fertilizing for the first few weeks. After that, once every 4-6 weeks during active growth is usually enough.
Natural boosters like compost tea or diluted fish emulsion are excellent choices. They add nutrients gently, without the chemical overload. Compost tea in particular boosts beneficial microbes in the soil, which helps herbs absorb what they need without pushing them too fast. Think steady fuel, not rocket fuel.
Step 5: Harvesting for Health and Growth
Harvesting herbs isn’t just about flavor—it’s also how you keep your plants thriving. Cut too much too soon, and you risk weakening them. Wait too long and they bolt or go bitter. The sweet spot? Once your herb is a few inches tall and has several sets of leaves, it’s game time. For most herbs like basil or parsley, harvest in the morning when oils are strongest, and always leave at least two-thirds of the plant untouched to fuel regrowth.
The way you cut matters. Snip just above a leaf node or branching point; that’s where new shoots will emerge. Avoid yanking or tearing stalks—it stresses the plant and slows recovery. Use clean scissors or pruning shears for a clean cut.
Once cut, herbs don’t keep their punch forever. For short-term storage, wrap them in a damp paper towel and seal them in a container or bag in the fridge. For longer storage, drying or freezing works well. Ice cube trays filled with chopped herbs and olive oil are a solid freezer hack. Point is—if you’re growing them right, you’ll always have more. Store smart so you don’t waste that work.
Pro Tips for Success
To keep your herb garden running smoothly, a bit of planning goes a long way. Start by grouping herbs with similar sunlight and water needs. Mediterranean herbs like rosemary, thyme, and oregano thrive in full sun and drier soil. On the other hand, moisture-lovers like basil and parsley prefer more frequent watering and a bit of shade. Keeping like with like saves guesswork and avoids over- or under-care.
Got herbs indoors? Don’t just set them on the windowsill and forget them. Rotate the pots every few days to make sure all sides of the plant get even light. Otherwise, you’ll end up with lopsided herbs stretching toward the sun and losing their shape. Simple fix. Big impact.
Finally, lean into companion planting. Some herbs naturally help keep pests away. Basil and mint can deter aphids. Rosemary may confuse beetles. Planting them side by side not only saves space but reduces the need for sprays. It’s a more natural kind of garden resilience—and your herbs will appreciate the backup.
Common Mistakes to Avoid
Let’s keep this simple. There are a few rookie errors people make when starting a home herb garden that can sabotage the whole project.
First: using garden soil in pots. It may seem convenient, but garden soil is too dense. It compacts, holds too much water, and suffocates roots in containers. What you need is a light, well-draining potting mix made for containers. It gives roots room to breathe and lets excess water escape—two things your herbs badly need.
Speaking of water, mistake number two: ignoring drainage holes. No matter how pretty the pot is, if it doesn’t have a hole in the bottom, it’s a trap. Roots sit in soggy soil, rot fast, and your herbs die slow. Drill a hole. Use a liner. Just don’t skip it.
Finally, mint. Everyone loves mint until it takes over the yard. Planting it straight in the garden without containment is asking for a headache. Mint spreads aggressively and doesn’t play nice with neighbors. If you want mint, great—but grow it in a pot, even if you set the pot in a garden bed.
These may seem small, but they make the difference between thriving herbs and a dried-out collection of regrets.
Final Thoughts
A home herb garden doesn’t require a green thumb or a big budget. It’s a simple, approachable gateway into growing your own food—and it starts with just a few pots and some sunlight. Herbs are forgiving, fast-growing, and incredibly useful. Whether you’re tossing fresh basil into pasta or snipping some mint for tea, you’ll feel the results right away—fresh flavor, less waste, and a little more control over what goes on your plate.
The key is to start small. A couple of well-cared-for plants on a windowsill will do more for your kitchen than a dozen neglected ones in the backyard. Stick with it. Water when needed, snip regularly, and pay attention to how things respond. Over time, your mini herb patch becomes a reliable part of your routine—and your meals get a serious upgrade. No fluff. Just real, everyday payoff.


 Katherine Fitzpatrickersy also made an important impact in shaping Food Smart Base, lending her skills and commitment to strengthen the site’s foundation. Through her contributions, the platform has been able to highlight food trends and innovations while maintaining its mission of educating and inspiring its community.